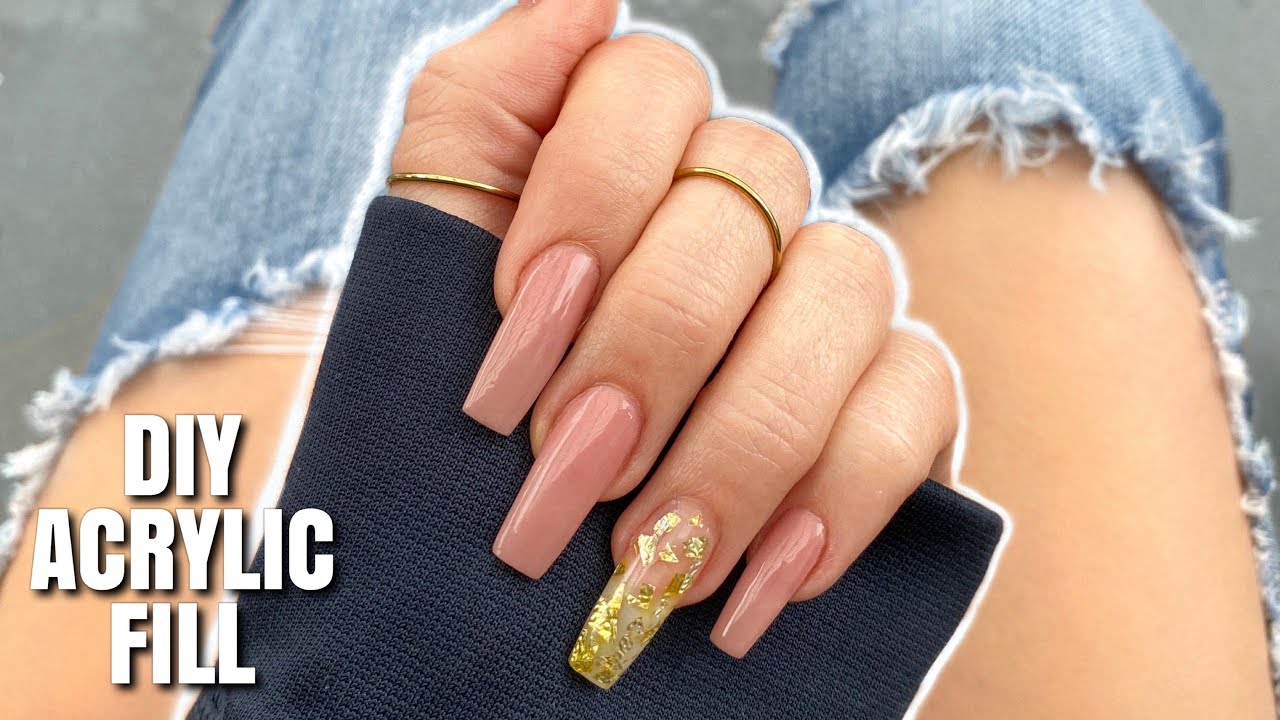
Filling Acrylic Nails At Home
How To Do An Acrylic Fill Youtube
Acrylic Nail Fill And Makeover Youtube
Nail Fill And Rebalance Step By Step Tutorial Youtube
Nail Hack How To Get A Fill For Free Youtube
How To Refill A 8 Week Old Set Acrylic Nails Tutorial Youtube

Diy Acrylic Nails Fill In At Home Youtube
Pour 100 percent acetone into a large Ziploc baggie filling.
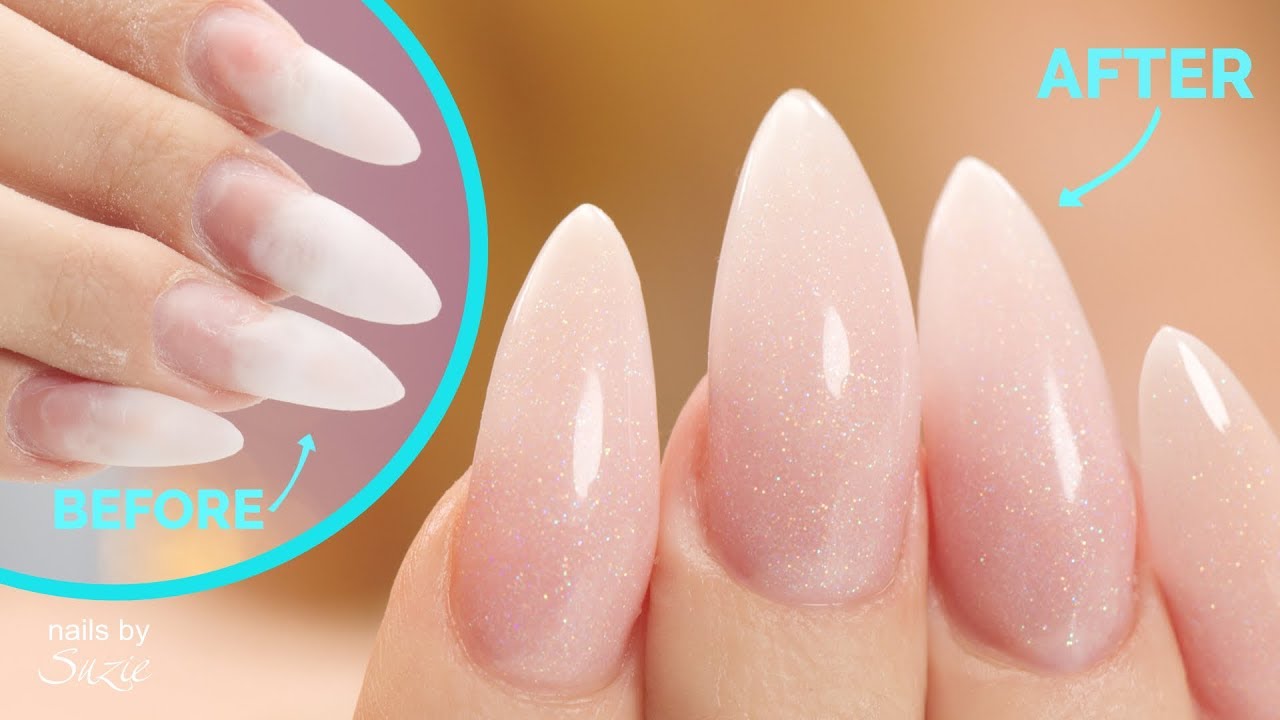
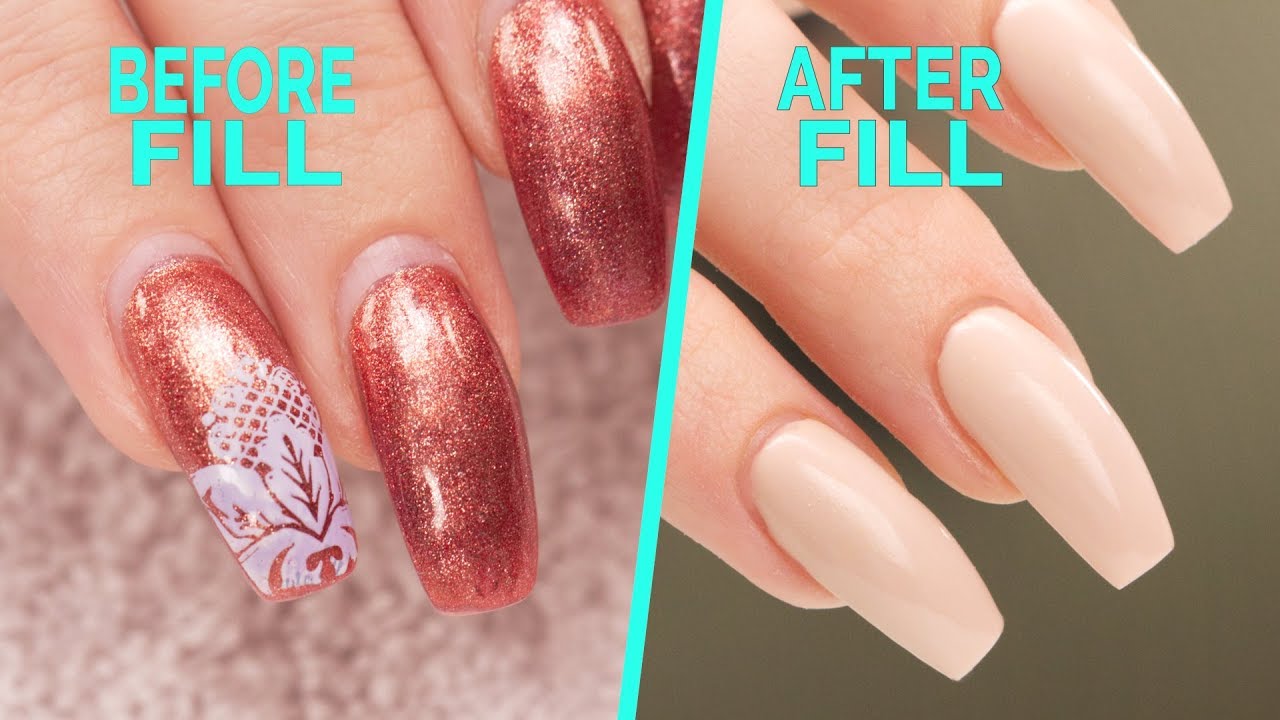
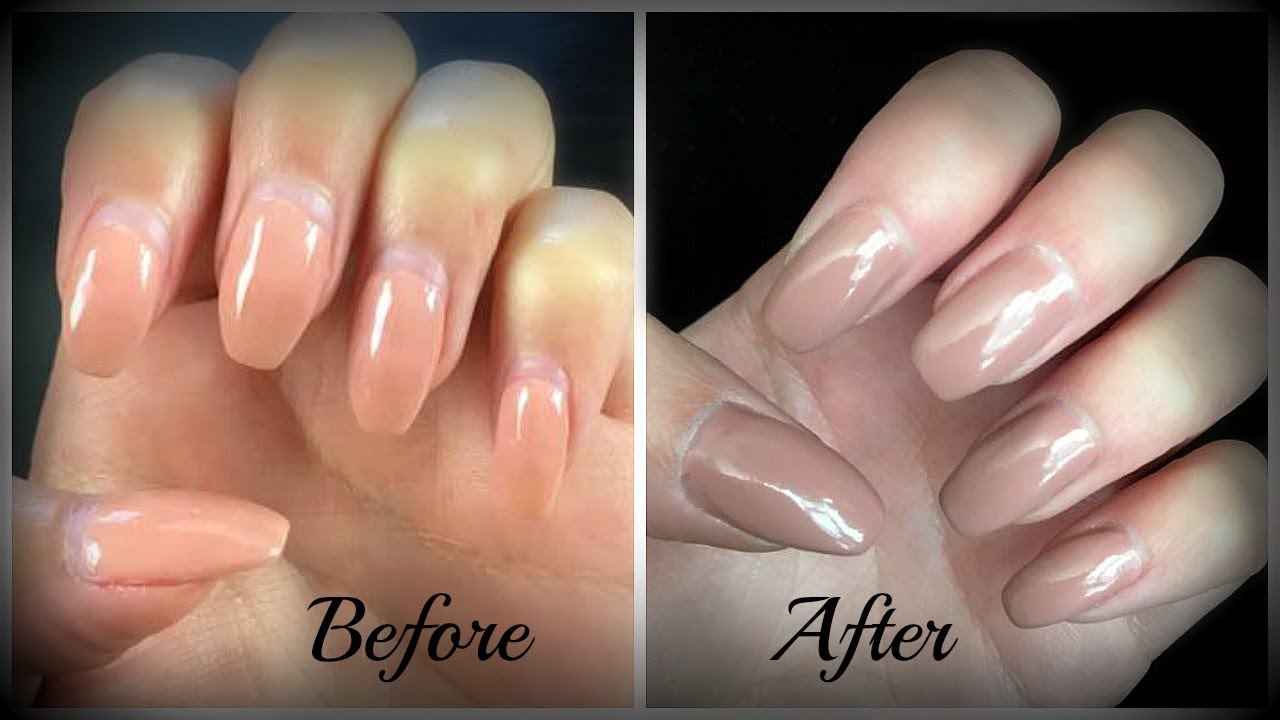
Filling acrylic nails at home. How to re-fill acrylic nails after 6 weeks Acrylic nails tutorial DIY nailsHow to re-fill acrylic nails after 6 weeks Acrylic nails tutorial DIY nail. Use a nail buffer to smooth the excess acrylic. These at-home sets come with dip powder liquid bonders sealers activators monomers and top coats plus files and buffers for that smooth-as-glass finish.
If you are desperate to cover up an unsightly ridge then file the fake nails down. The good news is you dont have to remove the fake nails. The e-file is an electronic file that is stronger and faster than using a regular nail.
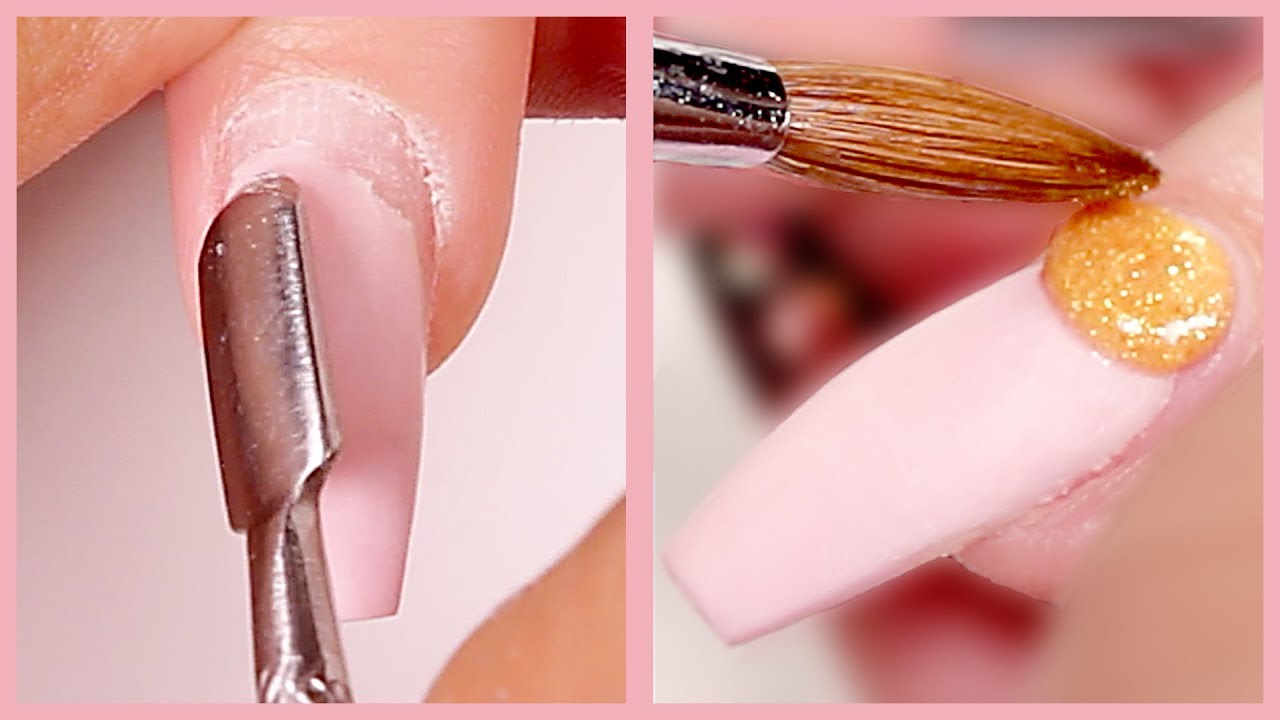
The good news is at NSI Nails Australia we have curated a variety of acrylic nail kits to help you get started with building your at-home pamper salon. Next use the nail primer in your kit to remove any moisture and oils from your nails then glue the tips halfway down the surface of each nail. Overworking the item after it has actually been put on the nail could develop air bubbles within the finished improvement.
This is one of the most important steps if you want a good adhesion so do not skip it. Once you are done clean your nails with a wipe baby wipes work too to. Look down the barrel of the nail and make sure the nail looks even and thinner.
Cut off your acrylic nails again get as close to your real nails as possible without actually snipping them off. Run the nail file over the top of the fake nails and file them until they are in line with your natural fingernails. Adjust the acrylic nail on top of your natural one.
Rub a buffer over the bumpy end of the acrylic where it meets your. You should use a nail dehydrator to your nails so that the nail tip and the natural nail perfectly bond to each other and it reduces lifting too. Step 4 Use cotton balls and nail primer to remove any moisture or oil from the nails.
Beauty Hack I Need A Fill Youtube
/ScreenShot2020-04-14at12.44.22PM-ad29736fd3674d00b228235c27da72fe.png)
How To Diy Acrylic Nails At Home

How Often Do You Need A Fill For Acrylic Nails New Expression Nails